The raglan t-shirt that I made for Mathias last week has now been embellished…
First though thanks to Karen (one of the book authors) for her helpful comments on Flickr, I now know that when using old knits you should add a bit of length to the neckband as it will have lost some of it’s stretch, also it’s very important to make sure you cut using the grainline indicated on the pattern piece. I fortunately didn’t make a mistake on that but I know it has been done and then you really can’t get the shirt over the head!
So once the shirt was out of the wash I had a think about what to do to spice it up a little. I’ve done quite a bit of t-shirt applique in the past:
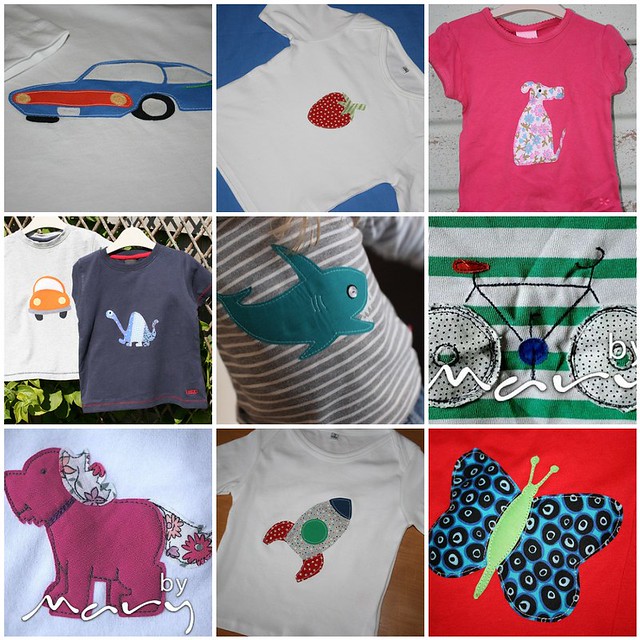
As you can see this has all been what I call ‘traditional’ applique in that it’s pieces of fabric stitched on top of another. I fancied a change and decided to have a go at reverse applique. This believe it or not involves applique on the reverse of the t-shirt! You may remember I wrote here about which way the shirt goes on, I had to be extra careful when doing the applique that is was on the inside not the outside!
So I ironed the t-shirt and the piece of fabric I was using for the applique and positioned the fabric piece on top of the t-shirt (inside out) and then ironed tear-away stabiliser on top of this in an attempt to hold the fabrics together and stabilise them whilst sewing. The stabiliser was also good for drawing my shape onto for stitching. For my first attempt I kept it simple and drew around a star template that I had. I then stitched along my pencil line with quite a short stitch. The stabiliser worked well and stitching was not a problem and much easier than in the construction of the t-shirt (but this time I was only sewing through 2 pieces of fabric).
Once I sewn the star shape I turned the t-shirt the right way out and took a pair of very sharp scissors and some caution and cut through the TOP LAYER OF FABRIC ONLY, 3-4mm inside the stitching line, so removing the inside of the star and revealing the contrasting fabric behind. (I then turned it back the other way to trim the excess fabric from around the outside of the star to make it more comfortable to wear)
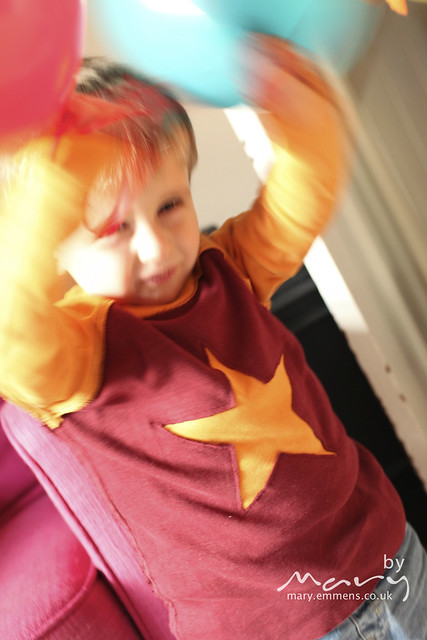
Mathias was coerced into changing his t-shirt in the middle of the day for a photoshoot because despite it being winter here the sun was shining brightly into our living room:
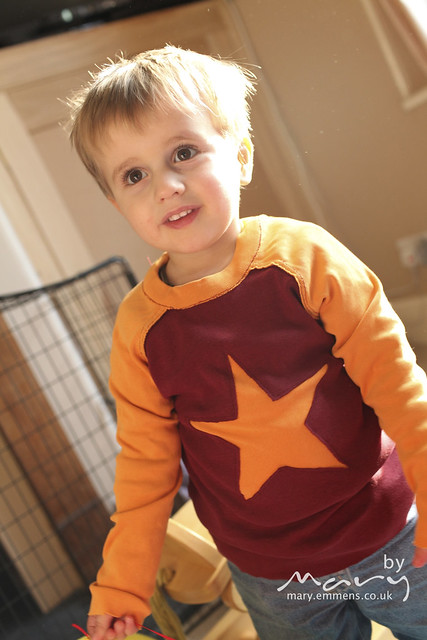
He was actually pretty compliant as one of his sisters had just returned from a birthday party and had brought balloons with her, he’ll pretty much do anything to play with a balloon (or 3).
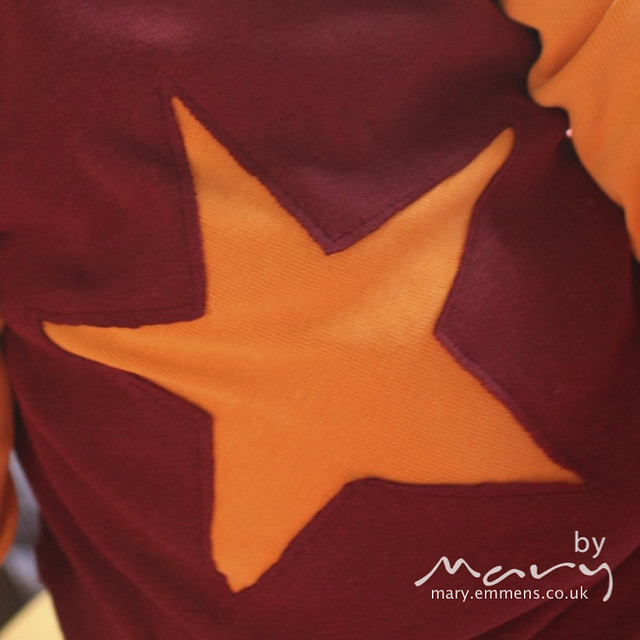
I decided not to stitch in a contrasting colour, or more to the point I didn’t really think about it until afterwards but you can just about see the stitch line on this close-up shot. Maybe next time I’ll remember and be brave enough to try.
In conclusion I really enjoyed having a go at sewing with knits and making this t-shirt, I’m definitely tempted to make more as long as I can find some nice knit fabric, so far my search has been fairly unproductive, if you have any suggestions for sellers of knit fabrics in the UK please let me know.
If you want a tutorial rather than me waffling about it go and read Crystal at Little Bit Funky’s post here which has photo’s to help you on your way.
Linking up with:


That is a seriously funky t shirt. My boys would love stuff like that. I had no idea what reverse applique was, but it sounds really cool to do 🙂
Very well done!!!
Looks fabulous!!! Like you, I’ve done plenty of applique, but have never tried reverse applique. It’s on my ‘To Do’ list. It really looks so effective on this outfit. Thanks for linking up…
That’s an adorable shirt! Love the reverse applique star.