I spent some time over the last week cutting vintage sheets up into fat quarters. I’ve now got a box full of approx 90! I do have plans for them and it doesn’t involve sewing with them! But I did have an urge to sew something with them and with Valentine’s day not far around the corner I got my thinking hat on.
While something big would be great I’ve got plenty to do at the moment and so wanted a quick project.
In my diary each 2 page spread is one page of Monday – Sunday and an opposite page of grid paper, this was great for sketching out some ideas, and this is what I came up with:
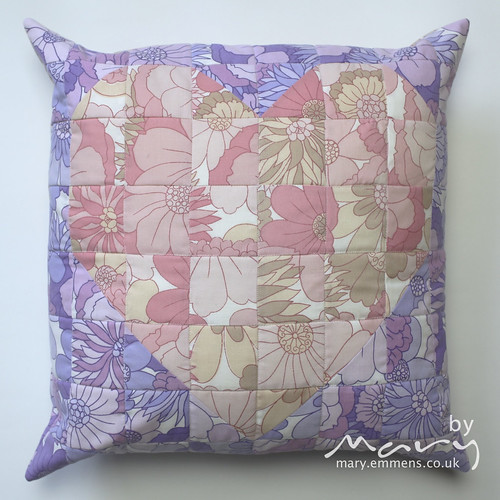
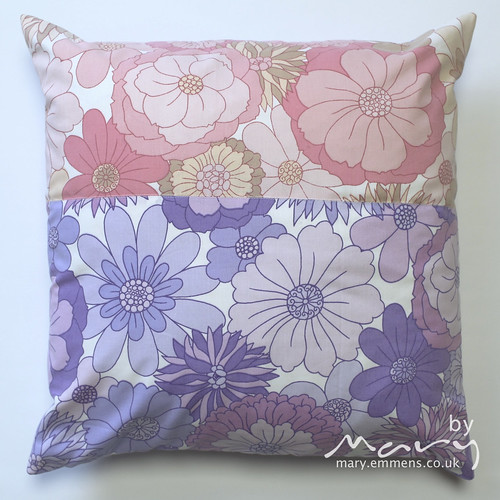
Yes, a patchwork heart cushion.
I opted for a 20″ cushion inner so want the finished cushion cover to be about 18″ square.
Here’s how you can make your own:
Materials (measurements are approx as I cut mine from various scraps and FQ’s):
1/2 yard fabric A (purple)
1/2 yard fabric B (pink)
1/2 yard lining fabric
19″ square piece of wadding
All seam allowance 1/4″ unless stated
Cut 34 3″ squares from fabric A
Cut 20 3″ squares from fabric B
Cut 5 4″ squares from fabric A
Cut 5 4″ squares from fabric B
The 4″ squares are to be used to make the half square triangles (HST) in the block.
On the back of each of fabric B 4″ square using a ruler draw a line diagonally across the square from corner to corner.
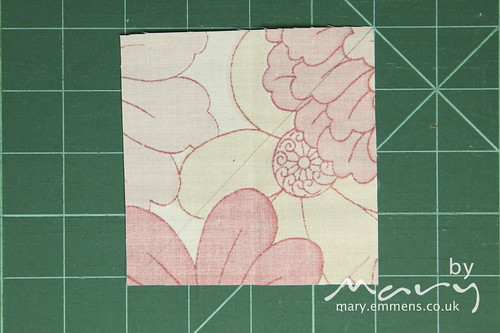
Then using one fabric A square and one fabric B square, place them right sides together, with the line facing up.
Stitch on both sides of that line with a 1/4″ seam allowance:
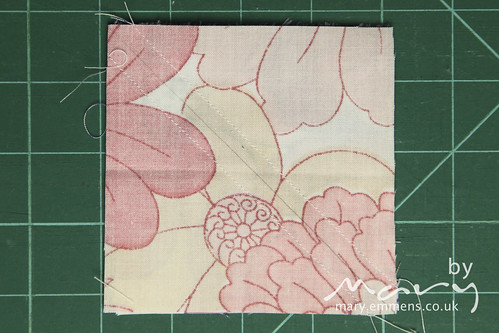
Using scissors or ruler and rotary cutter cut along your pencil line to cut the square into 2 triangles.
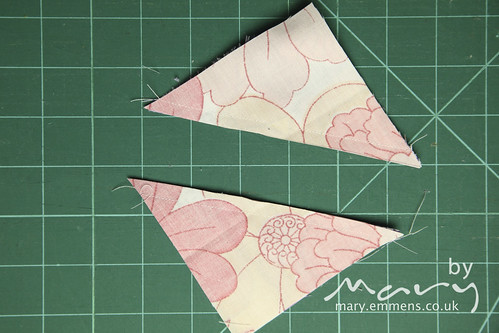
You now have 2 HST stitched together, one triangle fabric A and one of B.
Press the seams on these open so that the square lies flat:
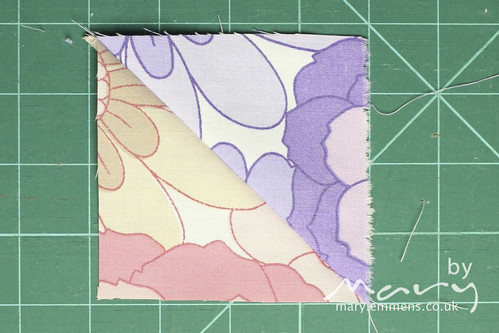
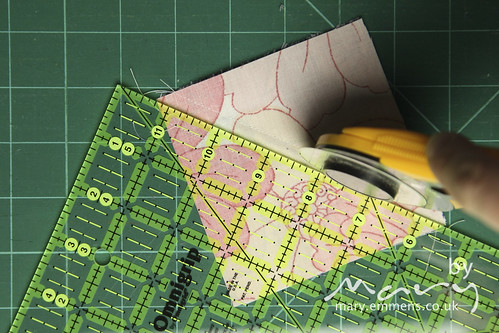
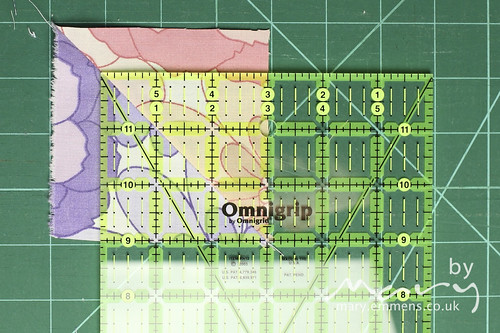
Now you need to cut it to size, it needs to be the same size as the square blocks you cut in the first step, mine were 3″. Make sure that you cut so that the triangles are equal size, that is easiest to do by using a quilting ruler and the diagonal mark on that.
Now you are ready to sew the rest of your pieces together. You may find it easiest to refer to the photograph below:
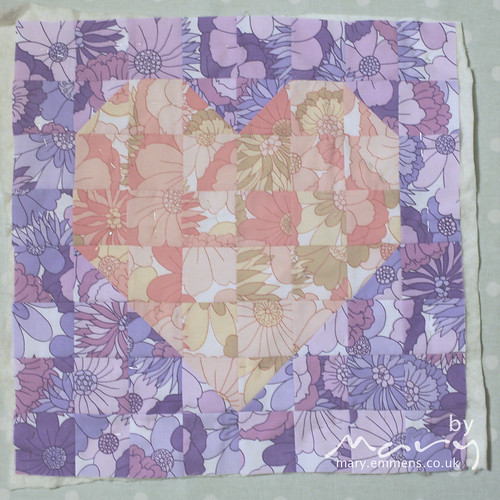
Row 1: 8 fabric A squares stitched together
Row 2: 1 fabric A, 1 HST, 1 fabric B, 2 HST, 1 fabric B, 1 HST, 1 fabric A
Row 3: 1 fabric A. 6 fabric B, 1 fabric A
Row 4: 1 fabric A. 6 fabric B, 1 fabric A
Row 5: 1 fabric A, 1 HST, 4 fabric B, 1 HST, 1 fabric A
Row 6: 2 fabric A, 1 HST, 2 fabric B, 1 HST, 2 fabric A
Row 7: 3 fabric A, 2 HST, 3 fabric A
Row 8: 8 fabric A squares
Now press all your seams open/flat.
Lay your strips out in order just to make it easier to sew them together in the right order!
Stitch each row together and press each seam open or to one side when you have finished so that it all lays flat.
Now cut a piece of lining fabric and wadding to the same size as your panel. Make a sandwich with lining fabric on the bottom, wadding then your heart panel on top, pin through all 3 layers to hold your sandwich together.
Quilt using your choice of design. It was a bit late when I got to this point so I just quilted in the ditch. But I’m sure you can be more imaginative in your design.
For the back of the cushion I used a piece of each of fabric A and B. Approx 9.5″ of fabric A and 10″ fabric B. I lined the back too just for extra strength.
Now you can assemble your cushion in your preferred way. I always go for an invisible zip, I like the neatness of it and once I’d done one there was no going back.
I use this tutorial for my invisible zip, although now I’ve made a few I don’t have to look at it! Hurrah.
If you want to make a envelope back I’d recommend this tutorial at Gone To Earth, I suggested it to a friend who was looking for a straightforward tutorial and she said it was fab!
I would love to hear any feedback/suggestions and PLEASE let me know if you have any questions. If you make a cushion using this tutorial I’d love to see.
Linking up with:


Sweet pillow, I love how the heart is subtle, almost camouflaged. I found a load of vintage sheets last summer but they were all a poly mix and many had stains on them. Thanks for the process!
This is lovely! That is all.
Love it Mary – fab x
Thanks for linking to my tutorial. Your pillow is really cute!
That is perfectly beautiful – I love the fabrics you have used
A beautiful combination of fabrics – I LOVE the subtle color variation! xo Kathy
Thanks for sharing your easy to follow tutorial. I like the subtlety of the heart!!! Great pillow! Thanks for linking up…
Your cushion is lovely! Thank you so much for linking up to the Valentine’s Day Showcase!
How very lovely!!! I am curious about the vintage sheets you used…are they 100% cotton or a cotton/poly blend? I have some older…not quite vintage yet, sheets and they’re a poly blend…wondering what to do with them…and where you find your vintage sheets? Do you comb the thrift stores and yard sales or search Etsy?
Pingback: Infinity and beyond | mary emmens
Your pillow is so pretty. I love the pink and purple. Thanks for linking this up to the Vintage Sheet Blog Weekend Link Up Party.