On the Friday before half term started I spent the morning taking apart Mathias’ cot, manhandling a mattress out of the loft and putting together a bed. Then I got a telephone call from school telling me that Leah wasn’t feeling well so please could I collect her. So with the bedrooms all in a bit of a state I went to get her and the chaos was untouched until the evening!
We’ve had a swap around and Bethan now has her own bedroom. It is pretty small, room for a bed and a chest of drawers and not much else. Fortunately we’d been given a cabin bed, it’s about 4 foot high so there is space underneath for nothing much, even Mathias has to mind his head when going underneath (due to the pieces supporting the bed). As space is limited Tobit managed to fit a wardrobe rail to the bottom of the bed for her clothes to hang on (dresses are too long for it).! Bethan has turned this space into a reading/book corner and has her scooter cushion in there but I felt she needed something else and suggested a bean bag chair. She jumped at the idea! Whoops! That meant I needed to find a pattern and make one!
It didn’t take long to find a pattern, in fact the first one I looked at seemed to do the job so I didn’t even search for any others. The pattern I used is available to download here (in the sidebar on the right hand side) for personal use.
(If you’re not interested in the pattern review but want photo’s of the finished chair then scroll on down quick!)
The pattern piece is great, bearing in mind that bean bags are big I was concerned that I would be piecing together a lot of paper pattern pieces but there are only 3 to tape together (plus one piece for the applique). The pattern suggests using 3 different yards of fabric, but not wanting to use any of my precious stash on an untested (by me) pattern I had a think about what I could use and decided on this:

The fabric is from a pair of curtains that I got from the car boot a while ago, I’ve sent some off to America in a vintage fabric swap and given some to my friend Jo, but I still had plenty left.
So with the paper pattern pieced I cut the outer fabric. The instructions say that once you have cut your pieces (on 2 folds) then the resulting piece will be football shaped. For a minute or two I was worried/confused until I realised that this being an American pattern they would have different shaped footballs to us in the UK! So if you are in the UK you should be expecting a rugby ball shape not a football.
The other pieces that you need are 2 strips of fabric 32″ x 2.5″, these strips are created from the leftovers of your 3 yards of fabric. I was slightly annoyed that there wasn’t an instruction to cut both pieces at the same time but if I’d read the pattern thoroughly at the beginning I would have known this and not tidied my cutting mat and rotary cutter away.
I stitched the cover together on Sunday afternoon, the suggestion is to serge/overlock the seams if you have a serger/overlocker, I don’t but I do have a overlocking type of stitch so I used that thinking that this particular item is likely to come in for some rough treatment! The closure is done with velcro of which I had plenty, the instructions for this were straightforward. The top and bottom where the seams meet are finished with an applique, I just used the same fabric for this as the main cover. The whole cover was finished in an afternoon.
There are no instructions for the liner other than to follow the instructions for the cover. Funnily enough I wasn’t keen on the idea of having a bean bag full of thousands of polystyrene balls being emptied all over the house by inquisitive fingers who wondered what was inside the lining, so I opted not to use a velcro closure. On the last seam instead of velcro I stitched the seam leaving a gap of approximately 5″ near the top of the seam (backstitching at both sides of the gap – most important to stop the seams from coming undone especially when your filling with poly balls!). Tobit gave me a hand to fill the bag with poly balls, I would really recommend having someone help you with this bit unless you want poly balls everywhere! I just happened to have a bag full in the loft, I bought them a few years ago for a project but never used them! I overlocked all the seams on the liner (probably more important to do these than the cover). The lining was made and finished on Monday evening ready for a week of lazing around reading.
Here she is posing on the landing with ‘The Worst Witch’ (or one of the books from that series).
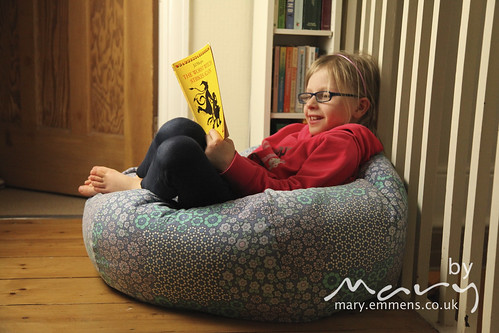
It was too dark in her bedroom for photographs and not much space to get a good angle either! It’s a child size bean bag but plenty big enough for her sister to join her on if allowed!

So in conclusion the pattern worked, the instructions were pretty clear, techniques were simple, I would say that a beginner could do this without a problem. A great pattern for using up excessive amounts of fabric! I would use it again, in fact a certain little girl is already asking…
On Thursday we were involved in organising the pop-up cafe in our local park and my friend Jo came along wearing her new bag:


Hee hee – my sewing is in your blog – I must have made it!
The beanbag looks great too!
That looks like a very comfortable perch for reading!
One very satisfied customer there. Better not invite your friend over though, she may lose her bag in the bean bag ;o)
Beanbag is fab! Perhaps i’ll get to test run it if we get around to organising ‘sewing day take 2’ I also think the choice of reading material is fab! Have just given all 3 of my worst witch books (over 20 years old copies!) to Eloise who read them all in a night each!